PHP 之 Smarty 模板引擎使用汇总
Smarty 介绍
Smarty 是 PHP 的一个引擎模板,可以更好的进行逻辑与显示的分离,即我们常说的 MVC,这个引擎的作用就是将 C 分离出来。
- 官网:https://www.smarty.net/
- 中文手册:https://www.smarty.net/docs/zh_CN/
- GitHub:https://github.com/smarty-php/smarty/
- 下载:https://github.com/smarty-php/smarty/releases
Smarty 安装
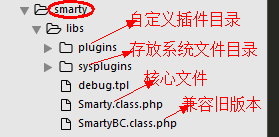
在网上下载 Smarty 包直接将其解压,我们需要的仅仅是里面的 libs 文件夹。
Libs 文件里面都是库文件,我们不应该修改里面的任何内容。
解压完毕后就直接将 libs 文件夹放入到我们需要使用的网站根目录。
Smarty 配置
首先打开 Smarty.class.php 文件看看里面的一些代码:
protected $template_dir = array('./templates/');
protected $config_dir = array('./configs/');
protected $compile_dir = './templates_c/';
protected $cache_dir = './cache/';
Smarty 的构造器:
- templates:默认存放模板文件夹
- templates_c:默认存放混编文件的文件夹
- cache:存放缓存
- configs:存放配置文件
默认左右边界符:
public $left_delimiter = "{";
public $right_delimiter = "}";
Smarty 简单使用
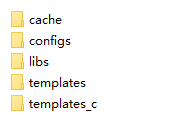
从上文了解到 Smarty 需要一些文件夹用来分别存放不同类别的文件。有 templates、templates_c、cache、configs 等文件夹。这是默认文件夹名称,你可以根据你的喜好对它们进行更改。
下面是我建立的文件夹:
简单实例:
先在 templates 文件夹下准备自己需要的模板文件。test1.html
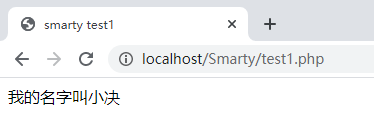
<!DOCTYPE html>
<html>
<head>
    <meta charset="utf-8">
    <title>smarty test1</title>
</head>
<body>
我的名字叫{$name}
</body>
</html>
在根目录下建立访问的逻辑文件。test1.php
<?php
require './libs/Smarty.class.php';
$smarty=new Smarty();
$name='小决';
$smarty->assign( 'name' , $name );
$smarty->display('./test1.html');
访问 test1.php 结果为:
当访问完后将会在 templates_c 中生成一个相应的混编文件。
Smarty 常用语法
普通变量的声明与使用
一共有两种声明变量的方法。
- 即 $smarty->assign ('name',' 值 ');
- 第二种:在模板文件中声明(html 中),即 {assignvar='name'value=' 值 '}
使用:{$name}
注意:也可以定义与使用数组。假若上面定义的 name 为一个一维数组,使用时即:{$name [2]}、{$name ['aa']}={$name.aa} 等等使用方式。
注释
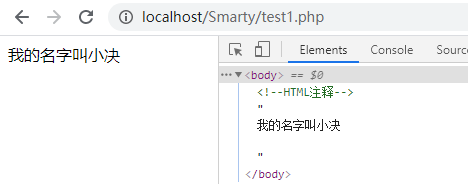
{*这里面是注释内容*}Smarty 的注释是不会在最终页面输出显示的,即:若在 html 里则效果像 <!--注释--> 一样,不过也有一定的区别,Smarty 的注释在浏览器里查看源代码也是不显示的,而 html 的注释是显示的。
代码:
<body>
<!--HTML注释-->
{* 这里面是注释内容 *}
我的名字叫{$name}
</body>
结果:
数组
Smarty 对数组的使用:数组 [下标]、数组。下标
对象
对象的声明和变量一样,通过 assign 来声明使用采用 -> 来调用对象的属性。
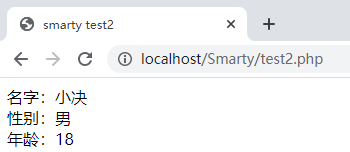
test2.php
<?php
require './libs/Smarty.class.php';
class Person{
	public $name="小决";
	public $sex="男";
	public $age='18';
}
$smarty=new Smarty();
$test=new Person();
$smarty->assign( 'test' , $test );
$smarty->display('./test2.html');
test2.html
<!DOCTYPE html>
<html>
<head>
    <meta charset="utf-8">
    <title>smarty test2</title>
</head>
<body>
名字:{$test->name}</br>
性别:{$test->sex}</br>
年龄:{$test->age}</br>
{$smarty.now}
<hr/>
</body>
</html>
结果:
保留变量
Smarty 中有一个特殊的变量(就是 smarty)可以通过这个变量很容易就可以访问到一些环境变量。就像 PHP 中的超全局变量一样神奇。
注意:在使用这个保留变量的时候:smarty 是对于大小写敏感的,我们需要的是小写的 smarty。
例子:
使用 smarty 访问 PHP 中的超全局数组变量:
- 获取
$_GET{$smarty.get.name}获取 get 中的 name 值 - 获取
$_POST{$smarty.post.name}获取 post 中的 name 值 - 获取
$_COOKIE{$smarty.cooke.name}获取 cookie 中的 name 值
同理,还可以获取
$_SERVER,$_ENV和$_SESSION等等。注意:虽然 Smarty 提供了较方便直接访问 PHP 超全局变量的方法,但必须谨慎使用。直接访问超全局变量会弄乱应用程序底层代码和模板语法。
最佳的实践是从 PHP 将需要的变量对模板进行赋值再使用。
- 获取
获取当前时间戳
{$smarty.now}其原理就是调用了timr()函数直接访问 PHP 常量
{$smarty.const.常量名},即:{$smarty.const.AGE}PHP 定义常量 smarty 直接调用常量结果
其他
- 获取配置变量:{$smarty.config}
- 返回当前模板名称:{$smarty.template}
- 返回当前模板对象:{$smarty.template_object}
- 返回当前目录名称:{$smarty.current_dir}
配置文件
在之前根据需求建立的 Configs 文件夹下,建立 Smarty.conf 配置文件(命名任意,木有明确规定),配置文件可以让设计者将全局的模板变量以文件的方式管理起来。
首先我们先来定义一些配置变量来对它进行简单的了解:
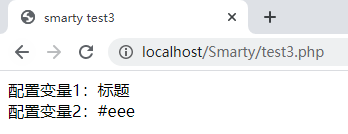
定义如下所示 的
Smarty.conf文件:title='标题' bodyColor='#eee'引入配置文件:{config_loadfile='Smarty.conf'}
引用配置变量:、{$smarty.config. 配置变量}
<body>
{config_load  file='Smarty.conf'}
配置变量1:{#title#}</br>
配置变量2:{$smarty.config.bodyColor}
</body>
查看:
段落变量
在 Smarty 配置文件中大体分为两种变量,一种为全局变量,另一种为段落变量。
- 全局全局变量故名思议就是就是每次载入这个配置文件的时候这些变量都会被加载
- 段落变量则有选择的进行加载。
段落变量的定义语法:[段落名字]
段落名字:这里可以是任意字符但不包括 [ 和 ]。
调用段落变量:在引入配置文件后面加上这段代码 section='段落名字'。
{config_load file='Smarty.conf' section='firstStyle'}注意:section 只能使用一次,若有多个 section 引入多个段落变量则最后一个会覆盖前面的所有 section 引入的段落变量,即只有最后一个引入的段落变量有用其他作废。
特别说明:
- 若全局变量与被加载的段落变量有相同的变量名,则段落名的值将覆盖全局变量的值。
- 若某个段落变量里含有相同的变量名,则最后一个的变量的值将会覆盖前面的值。
- 在整个 smarty.conf 文件中,点(.)拥有相对较高的权限的。点的作用是将一个变量或者整个段落隐藏,不能被使用。(我的理解就是相当于被注释掉不能被使用)
简单应用:
配置文件:
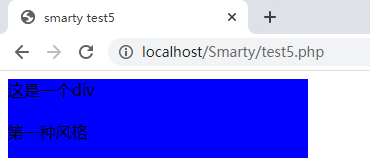
test5.conf#段落变量 #第一种颜色风格 [firstStyle] color='#00f' width='300px' height='300px' content='第一种风格' #第二种颜色风格 [secondStyle] color='#0f0' width='500px' height='500px' content='第二种风格'php 文件:
test5.php<?php require './libs/Smarty.class.php'; $smarty=new Smarty(); $smarty->display('./test5.html');模板文件:
test5.html{config_load file='Smarty.conf' section='firstStyle'} <!DOCTYPE html> <html> <head> <meta charset="utf-8"> <title>smarty test1</title> <style type="text/css"> #aa{ width: {#width#};height: {#height#};background: {#color#};} </style> </head> <body> <div id='aa'> 这是一个div<br/><br/> {#content#} </div> </body>效果:
特别说明:
若
#aa{width: 200px;height: 200px;background: red;}。则报错:
Fatal error: Uncaught --> Smarty Compiler: Syntax error in template "file:E:\software\php\php-page\Smarty\templates\test5.html" on line 8 "#aa{width: ;height: ;background: ;}" - Unexpected ": ", expected one of: "}" <-- thrown in E:\software\php\php-page\Smarty\libs\sysplugins\smarty_internal_templatecompilerbase.php on line 8
这是由于使用了 smarty 模板,所以在 html 的所有 {} 将会被 smarty 解析。
解决办法:
更换定界符
在
{前面加一个空格:#aa{ width:使用 {literal}{/literal} literal: 原样的,原义的
{literal}#aa{width{/literal}: {#width#};height: {#height#};background: {#color#};}{literal} 标签会影响变量的解析!
模板布局
即是模板的继承问题。使用的关键字主要有 block、extends
先在站点建立一个 layout 文件夹(主要用来存放父模板文件),在文件夹下建立一个模板文件 template.html
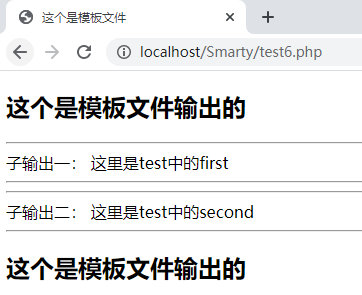
<!DOCTYPE html>
<html>
<head>
    <meta charset="utf-8">
    <title>这个是模板文件</title>
</head>
<body>
<h2>这个是模板文件输出的</h2>

<hr/>
子输出一:{block name='first'}{/block}
<hr/>
<hr/>
子输出二:{block name='second'}{/block}
<hr/>

<h2>这个是模板文件输出的</h2>
</body>
</html>
再建立模板文件 test.html,此模板需要继承上面的父模板
{extends file='layout/template.html'}
{block name='first'}
	这里是test中的first
{/block}
{block name='second'}
	这里是test中的second
{/block}
php 逻辑文件调用 smarty
<?php
require './libs/Smarty.class.php';
$smarty=new Smarty();
$smarty->display('./test6.html');
访问结果
若含较多的公共部分,则采用布局文件;含公共部分较少,则采用包含文件 {include file=' 文件路径 '}